Showing posts with label Breads. Show all posts

Wednesday, June 16, 2010

Daring Cooks' Pâtés and Bread

Our hostesses this month, Evelyne of Cheap Ethnic Eatz, and Valerie of a The Chocolate Bunny, chose delicious pate with freshly baked bread as their June Daring Cook’s challenge! They’ve provided us with 4 different pate recipes to choose from and are allowing us to go wild with our homemade bread choice.

Ooops, i'm a day late for the challenge :( Life has been so busy these days that i just can't find the time and will to blog. JLo's graduating and he's busy packing and shipping his 5 years of junk away. Seeing his room empty out day by day makes me even more sad to do anything else, SIGHHHH, this sucks. We're both heading back to TW this weekend and thus starts our 1 year long-distance relationship, we'll see how that goes :(

On a brighter note, I was really excited when this months' Daring Cooks' challenge was revealed because one of my favorite bloggers, Valerie, whom i have followed for quite some time is the co-host! Valerie and Evelyne gave us many recipes for Pates to choose from and I went with a double-layered Vegetable Pâté (no pesto layer) and the Chicken Liver Terrine. Growing up in a Taiwanese household meant that chicken livers or any type of animal organs wasn't going to gross me out-- making AND tasting the Pâté was no problem for me! JLo also shared some with one of his friends and he told us that Pâté, or called "Pasztet" in Poland, is also very commonly eaten in Polish households. He said it tasted very much like the ones his grandmother makes! So thanks, Valerie and Evelyne, for sharing this awesome recipe with us!

Chicken Liver Terrine
Yields one 25 by 12,5 cm (10 by 5 inch) terrine or loaf pan
INGREDIENTS:
  • 1 tbsp duck fat, or butter
  • 2 onions, coarsely chopped
  • 300g (11 oz) chicken livers, trimmed
  • 3 tbsp brandy, or any other liqueur (optional)
  • 100g (3 1/2 oz, 1/2 cup) smoked bacon, diced
  • 300g (11 oz) boneless pork belly, coarsely ground
  • 200g (7 oz) boneless pork blade (shoulder), coarsely ground (or ground pork see note below)
  • 2 shallots, chopped
  • 1 tsp quatre-épices (or 1/4tsp each of ground pepper, cloves, nutmeg and ginger is close enough)
  • 2 eggs
  • 200 ml (7 fl oz, 3/4 cup + 2 tbsp) heavy cream
  • 2 fresh thyme sprigs, chopped
  • Salt and pepper
    NOTE: If you cannot find ground pork belly or blade, buy it whole, cut it into chunks, and pulse in the food processor. You can also replace the pork blade with regular ground pork
DIRECTIONS:
  1. Preheat oven to 200ºC (400ºF, Gas Mark 6).
  2. Melt the fat or butter in a heavy frying pan over low heat. Add the onions and cook, stirring occasionally, for 5 minutes, until softened. Add the chicken livers and cook, stirring frequently, for about 5 minutes, until browned but still slightly pink on the inside [picture 1].
  3. Remove the pan from heat. Pour in the brandy, light a match and carefully ignite the alcohol to flambé. Wait for the flames to go out on their own, carefully tilting the pan to ensure even flavoring [picture 2]. Set aside.
  4. Put the minced pork belly and blade in a food processor, then add the onion-liver mixture and the chopped shallots, and pulse until you obtain a homogenous mixture – make sure not to reduce it to a slurry [picture 3, 4].
  5. Transfer to a bowl, and gradually stir in the chopped bacon, quatre-épices, cream, eggs, and thyme. Season with salt and pepper, and mix well [picture 5]. Spoon the mixture into a terrine or loaf pan, and cover with the terrine lid or with aluminum foil [picture 6].
  6. Prepare a water bath: place the loaf pan in a larger, deep ovenproof dish (such as a brownie pan or a baking dish). Bring some water to a simmer and carefully pour it in the larger dish. The water should reach approximately halfway up the loaf pan.
  7. Put the water bath and the loaf pan in the oven, and bake for 2 hours. Uncover and bake for another 30 minutes. The terrine should be cooked through, and you should be able to slice into it with a knife and leave a mark, but it shouldn’t be too dry. Refrigerate, as this pâté needs to be served cold. Unmold onto a serving platter, cut into slices, and serve with bread.
  8. NOTE: This pâté freezes well. Divide it into manageable portions, wrap tightly in plastic film, put in a freezer Ziploc bag, and freeze. Defrost overnight in the fridge before eating.
Chicken Liver Terrine

===============================

Vegetable Pâté
Yields one 25 by 12,5 cm (10 by 5 inch) terrine or loaf pan
1. Line your pan with plastic wrap, overlapping sides.

White Bean Layer
  • 2 x 15-ounce / 900 ml cans cannellini (white kidney beans), rinsed, drained thoroughly
  • 1 tbsp / 15 ml fresh lemon juice
  • 1 tbsp / 15 ml olive oil
  • 1 tbsp / 15 ml minced fresh oregano or 1 teaspoon dried
  • 2 garlic cloves, pressed
2. Mash beans in large bowl. Add lemon juice, olive oil, oregano and garlic and blend until smooth. Season to taste with salt and pepper. Spread bean mixture evenly on bottom of prepared pan [picture 1, 2].

Red Pepper Layer
  • 7-ounce / 210 ml jar roasted red bell peppers, drained, chopped
  • 3/4 cup / 180 ml crumbled feta cheese (about 4 ounces)
3. Combine peppers and feta in processor and blend until smooth. Spread pepper mixture evenly over bean layer in prepared dish [picture 3, 4].

4. Cover with plastic wrap and refrigerate overnight.

5. To unmold, invert pâté onto serving platter. Peel off plastic wrap from pâté. Garnish with herb sprigs and serve with sourdough bread slices.

Vegetable
Pâté

===============================
Peter Reinhart's French Bread
via www.applepiepatispate.com


I stumbled across this wonderful recipe through Judes' Apple pie, Patis, and Pâté. The recipe can also be found in Peter Reinhart’s The Bread Baker’s Apprentice.


Homemade French Bread

Sunday, February 14, 2010

Daring Cooks' Mezze Table (Pita, Hummus, Falafels)

The 2010 February Daring COOKs challenge was hosted by Michele of Veggie Num Nums. Michele chose to challenge everyone to make mezze based on various recipes from Claudia Roden, Jeffrey Alford and Naomi Dugid.

I'm gonna make this a super quick update since I seem to have forgotten that not only is today valentines day and CNY, it's also the posting date! So here I am writing a super last minute iPhone (not mine, btw) update... in Prague! Yep, we made a weekend trip here after my horrific pediatrics final on Saturday. Enjoyed some good food and company then we'll be heading home tomorrow :(

So this months challenge was to make our own mezze table. Mezze is a Middle Eastern style of eating consisting of multiple small dishes. I was kind of worried at first since it looked like a challenge that would take at least 2 days to prepare, but even with finals lurking around the corner I managed to squeeze in a day (a whole day) to complete it. My favorite plate was the Pita bread. WOW, they came out better than the ones store-bought! I followed the recipe to the "T" (even with the 100 stirs) and they puffed up beaaauuutifully in exactly 3 minutes on the highest rack of my oven. All of them could be cut in half and used as pita pockets. I later stuffed mine with some veggies, falafels, topped with cucumber raita, it was DELICIOUS. I LOVE YOU, Michele, for sharing such a great recipe with us. This is definitely going in my recipe box. And i love the fact that they can be baked in 3 minutes! It makes up for the long dough-rising time which i always hate to wait on :) Ok, I'm falling asleep and this tiny screen is starting to hurt my eyes. Hope everyone had a lovely valentines and cny!

Mezze Table

Pita Bread
Recipe adapted from Flatbreads & Flavors by Jeffrey Alford and Naomi Duguid
Prep time: 20 minutes to make, 90 minutes to rise and about 45 minutes to cook
INGREDIENTS:
  • 2 teaspoons regular dry yeast
  • 2.5 cups lukewarm water
  • 5-6 cups all-purpose flour
  • 1 tablespoon salt
  • 2 tablespoons olive oil
DIRECTIONS:
  1. In a large bread bowl, sprinkle the yeast over the warm water. Stir to dissolve [picture 1]. Stir in 3 cups flour, a cup at a time, and then stir 100 times, about 1 minute, in the same direction to activate the gluten. Let this sponge rest for at least 10 minutes, or as long as 2 hours [picture 2, 3].
  2. Sprinkle the salt over the sponge and stir in the olive oil. Mix well. Add more flour, a cup at a time, until the dough is too stiff to stir [picture 4]. Turn it out onto a lightly floured surface and knead for 8 to 10 minutes, until smooth and elastic [picture 5]. Rinse out the bowl, dry, and lightly oil. Return the dough to the bowl and cover with plastic wrap. Let rise until at least doubled in size, approximately 1 1/2 hours [picture 6].
  3. Place a pizza stone, or two small baking sheets, on the bottom rack of your oven, leaving a 1-inch gap all around between the stone or sheets and the oven walls to allow heat to circulate. Preheat the oven to 450F (230C).
  4. Gently punch down the dough. Divide the dough in half, and then set half aside, covered, while you work with the rest. Divide the other half into 8 equal pieces and flatten each piece with lightly floured hands [picture 7]. Roll out each piece to a circle 8 to 9 inches in diameter and less than 1/4 inch thick [picture 8]. Keep the rolled-out breads covered until ready to bake, but do not stack.
  5. Place 2 breads, or more if your oven is large enough, on the stone or baking sheets, and bake for 2 to 3 minutes, or until each bread has gone into a full balloon [picture 9]. If for some reason your bread doesn't puff up, don't worry it should still taste delicious. Wrap the baked breads together in a large kitchen towel to keep them warm and soft while you bake the remaining rolled-out breads. Then repeat with the rest of the dough.
Pita Bread

Hummus
Recipe adapted from The New Book of Middle Eastern Food by Claudia Roden
Prep Time: Hummus can be made in about 15 minutes once the beans are cooked. If you’re using dried beans you need to soak them overnight and then cook them the next day which takes about 90 minutes.
INGREDIENTS:
  • 1.5 cups dried chickpeas, soaked in cold water overnight (or substitute well drained canned chickpeas and omit the cooking)
  • 2-2.5 lemons, juiced
  • 2-3 garlic cloves, peeled and crushed
  • a big pinch of salt
  • 4 tablespoons tahini (sesame paste) OR use peanut butter or any other nut butter—feel free to experiment)
  • Additional flavorings (optional) I would use about 1/3 cup or a few ounces to start, and add more to taste
DIRECTIONS:
  1. Drain and boil the soaked chickpeas in fresh water for about 1 ½ hours, or until tender [picture 1]. Drain, but reserve the cooking liquid.
  2. Puree the beans in a food processor (or you can use a potato masher) adding the cooking water as needed until you have a smooth paste [picture 2, 3].
  3. Add the rest of the ingredients and mix well [picture 4]. Adjust the seasonings to taste.
Hummus
Cucumber Raita
Recipe adapted from The Indian Grocery Store Demystified by Linda Bladholm
Prep time: Approximately 15 minutes
INGREDIENTS:
  • 1 medium cucumber, peeled and most of the seeds removed
  • 1 teaspoon cumin seeds OR use a small pinch of dried cumin—to taste
  • 2 cups plain Greek yogurt (473ml)
  • 1 garlic clove, peeled and minced
  • fresh coriander or mint, chopped, a couple pinches or more to taste
  • Cayenne pepper or paprika, just a pinch to use as a garnish (optional)
DIRECTIONS:
  1. Peel cucumber, de-seed, and dice. Blot off moisture with paper towels.
  2. Toast cumin seeds for a few seconds in a small, heavy frying pan over high heat.
  3. In a bowl, stir yogurt until it is smooth.
  4. Mix it with the cumin, garlic and coriander or mint leaves (I used some grated radish instead).
  5. Stir in the cucumber and sprinkle with cayenne or paprika, and chill before serving.
Cucumber Raita

Falafels
Recipe from Joan Nathan and Epicurious.com
Prep Time: Overnight for dry beans and 1 hour to make Falafels
INGREDIENTS:
  • 1 cup dried chickpeas, soaked in cold water overnight OR use well canned drained chickpeas
  • 1/2 large onion (roughly chopped, about 1 cup)
  • 2 tablespoons fresh parsley, chopped OR use a couple pinches of dried parsley
  • 2 tablespoons fresh cilantro, chopped OR use a couple pinches of dried cilantro
  • 1 teaspoon table salt
  • 1 teaspoon dried hot red peppers (cayenne)
  • 4 whole garlic cloves, peeled
  • 1 teaspoon cumin
  • 1 teaspoon baking powder
  • 4 tablespoons all-purpose flour (you may need a bit extra)
  • Tasteless oil for frying (vegetable, canola, peanut, soybean, etc.), you will need enough so that the oil is three inches deep in whatever pan you are using for frying
DIRECTIONS:
  1. Put the chickpeas in a large bowl and add enough cold water to cover them by at least 2 inches. Let soak overnight, and then drain. Or use canned chickpeas, drained.
  2. Place the drained, uncooked chickpeas and the onions in the bowl of a food processor fitted with a steel blade. Add the parsley, cilantro, salt, hot pepper, garlic, and cumin. Process until blended but not pureed. If you don’t have a food processor, then feel free to mash this up as smooth as possible by hand [picture 1].
  3. Sprinkle in the baking powder and 4 tablespoons of the flour, and pulse [picture 2]. You want to add enough bulgur or flour so that the dough forms a small ball and no longer sticks to your hands. Turn into a bowl and refrigerate, covered, for several hours.
  4. Form the chickpea mixture into balls about the size of walnuts.
  5. Heat 3 inches of oil to 375 degrees (190C) in a deep pot or wok and fry 1 ball to test. If it falls apart, add a little flour. Then fry about 6 balls at once for a few minutes on each side, or until golden brown [picture 3].
  6. Drain on paper towels [picture 4].
Falafels

Friday, February 05, 2010

Chinese Steamed Meat Buns (鮮肉包子)

As I've mentioned before, i was quite the busy bee this summer in Taiwan. With the unbearable heat in Kaohsiung, I mostly stayed indoors and only went out at night. Other than staying home hiding from the deadly UV rays, my only activity during the day was to push my bread machine to its limit and making enough buns to feed my family for weeks. The only time i took a break was when our freezer ran out of space to store them... but recess only lasted for about 2 days and then it was back to the bun-making cycle all over again. So as my summer came to an end, my mom started to get anxious about the fact that our one-man bun factory was about close down. So as you can imagine, I had to work extra shifts during my last week in Taiwan... And if i was actually getting paid for the hours i put into the buns, i think i could actually make a decent living out of it! Ok, just kidding... more like 2 Macdonald's happy meals per day (damn Asia with its cheap labor and meager minimum wage!).

So here's the recipe that i use for basic steamed buns (it's the same one i used for the Gua Baos 割包). You can make regular Mantous out of these or stuff them with any filling you'd like-- sweet or savory. I haven't got the time to try out any sweet bun recipes yet, but when i do, there'll be red bean buns updates for sure. Enjoy!

Chinese Steamed Meat Buns (鮮肉包子)
INGREDIENTS:
  • MEAT FILLING:
  • 600 grams ground pork
  • 1 egg
  • 1 tablespoon fresh ginger, minced
  • 1.5 teaspoons salt
  • 1.5 teaspoons sugar
  • 1.5 teaspoons chicken bouillon granules
  • 1.5 teaspoons black pepper
  • 1 tablespoon rice wine
  • 1 tablespoon soy sauce
  • 1 tablespoon sesame oil
  • 1 tablespoon corn starch
  • 1.5 cups spring onions, chopped
    This recipe yields more than enough meat filling for the dough recipe below (leftovers depend on how much meat you put in each bun). You can either make another batch of dough with the leftover meat or freeze them until next time!

  • DOUGH:
  • 1 cup water
  • 40 grams (6 tablespoons) sugar
  • 1 teaspoon salt
  • 1 tablespoon olive oil
  • 500 grams high-gluten flour
  • 1 tablespoon powdered milk
  • 1 teaspoon baking powder
  • 2.5 teaspoons active dry yeast
DIRECTIONS:
  1. For the Filling: Place all Filling ingredients into a big mixing bowl and using your hands, mix until everything is combined. Cover and refrigerate until the buns are ready [picture 1, 2].

  2. For Bread Machine: place all dough ingredients in the listed order into your bread machine [picture 3, 4]. Set the mode to "Knead and Rise" (this took around 1 hour and 20 minutes on my bread machine).
  3. If kneading by hand, you can also place all ingredients in the listed order into a big bowl and knead for 15 - 20 minutes until the dough forms a smooth ball. Put the dough in a bowl, cover and let rise in a warm place for 1 hour, or until doubled in size.
  4. Remove the dough and separate it into 50 gram pieces [picture 5].
  5. Form the dough into a ball. With a rolling pin, flatten it out into a circle. Roll the edges of the circle thinner, leaving a thicker pad in the center [picture 6].
  6. Place 1 - 2 tablespoons of meat filling in the center of the dough and pleat and seal the edges to form a bun [picture 7] (it takes A LOT of practice, i still haven't perfected it yet!).
  7. Place the buns on cut-out baking paper or a cheesecloth to prevent sticking. Let it rise for another 30 minutes, covered, in a warm place [picture 8].
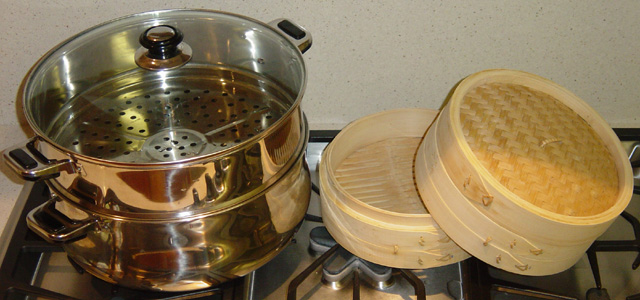
  8. When the dough has risen after 30 minutes, place them inside the metal or bamboo cooking steamers that you are using. Make sure they do not touch, standing about 1 inch away from each other.
  9. Turn on the stove to high heat until the water starts to boil [picture 9]. Once the water has boiled, turn down to medium heat and steam for 10 minutes.
  10. After 10 minutes, turn off the heat and let it rest, untouched, for another 10 - 15 minutes.
  11. Open the lid carefully, making sure water on the lid does not drop onto the buns. Remove the buns and place onto your serving plate. Serve while hot.
Steaming TIPS:
  • Avoid opening the lid too soon-- the buns will collapse when met with cold air.
  • Make sure the water on the steamer lid does not drop onto the buns, as they will create rough surfaces.
  • If the buns harden up after leaving them out for too long, just quickly steam them again and they'll be soft and fluffy in no time.
Chinese Steamed Meat Buns

Sunday, November 22, 2009

"Tiger Bites Pig" 虎咬豬 Taiwanese Braised Pork Belly stuffed in Sliced Buns 割包

Anyone who calls him or herself a true Taiwanese should be no stranger to today's dish. Though the more common street name for it is "Gua Bao (割包)", they are also referred to as "Ho Ka Ti (虎咬豬)" in the Taiwanese dialect, which literally translates into "Tiger Bites Pig". But before you let your imagination run wild, let me just clarify that there are no illegal tiger-eating involved here. This dish rather got its distinct name by the shape of its bun. Instead of cutting a regular Mantou in half, sliced buns are customarily made to be used for Gua Bao. The two bun flaps resembles the mouth of a tiger, and if you are gifted enough, you should be able to see a tiger biting a piece of pork. Cute, huh? The traditional Gua Bao is stuffed with braised pork, sweet peanut powder, pickled mustard greens, and a huge bunch of cilantro. But since I had no access to 3/4 of the condiments, i improvised and made my own peanut powder (or more like granules) and sprinkled it with chopped spring onions instead. My Guao Bao may not be 100% authentic... but for a taiwanese food-deprived person like me, i couldn't even tell the difference! It's really that piece of slowly braised pork belly (which simply melts down your throat) that plays the key role to this celebrated Taiwanese sandwich. With the excess oil and fat melting out of the pork during the long braising/cooking hours, 'greasy' would be the last word you use to describe Gua Baos. So don't let that fatty piece of pork scare you away, give it a try... it's the best part!

Part #1: Sliced Buns
from 美食美景紐西蘭美女的家
makes 14 sliced buns
INGREDIENTS:
  • 1 cup water
  • 40 grams (6 tablespoons) white sugar
  • 1 teaspoon salt
  • 1 tablespoon olive oil
  • 500 grams high-gluten flour
  • 1 tablespoon powdered milk
  • 1 teaspoon baking powder
  • 2.5 teaspoons active dry yeast
DIRECTIONS:

  1. For Bread Machine: place all ingredients in the listed order into your bread machine. Set the mode to "Knead and Rise" (this took around 1 hour and 20 minutes on my bread machine).
  2. If kneading by hand, you can also place all ingredients in the listed order into a big bowl and knead for 15 - 20 minutes until the dough forms a smooth ball [picture 1]. Put the dough in a bowl, cover and let rise in a warm place for 1 hour, or until doubled in size [picture 2].
  3. Remove the dough and separate it into 50 gram pieces (around 14).
  4. Form the dough into a ball and with a rolling pin, roll it out into a long oval shape [picture 3].
  5. Light brush one surface with vegetable oil and fold the dough in half [picture 3, 4]. Place the dough on cut-out baking paper or a cheesecloth to prevent sticking. Let it rise for another 30 minutes, covered, in a warm place [picture 4].
  6. When the dough has risen after 30 minutes, place them inside the metal or bamboo cooking steamers that you are using. Make sure they do not touch, about 1 inch away from each other.
  7. Turn on the stove to high heat until the water starts boiling.
  8. Once the water has boiled, turn down to medium heat and steam for 10 minutes.
Steaming TIPS:
  • Avoid opening the lid too soon-- the buns will collapse when met with cold air.
  • Make sure the water on the steamer lid does not drop onto the buns, as they will create rough surfaces.
  • If the buns harden up after leaving them out for too long, just quickly steam them again and they'll be soft and fluffy in no time.

    Part #2: Tiger Bites Pig 虎咬豬
    from ytower.com
    INGREDIENTS:
    • TAIWANESE BRAISED PORK BELLY:
    • 600 grams skin-on pork belly, cut into half inch slices
    • 3 cloves garlic, crushed
    • One Bunch of spring onions, cut into 3 inch segments (or 1 whole onion)
    • 5 slices fresh ginger
    • 2 red chili peppers (more if desired), sliced
    • 1 Chinese spice bag
    • 50 mililiters rice wine
    • 3/4 cups soy sauce
    • 3 to 4 cups water (enough to submerge the meat)
    • 1/3 cups brown sugar
    • Hard boiled eggs, peeled (optional)
      (To utilize your sauce to its fullest, you can add in some eggs to make another dish: Taiwanese Stewed Eggs!)

    • TIGER BITES PIG:
    • Steamed sliced buns (recipe above)
    • Braised Pork belly
    • Sweet peanut powder
      (or pulse peanuts and a little bit of powdered sugar into a powder with your food processor)
    • Pickled mustard greens (酸菜)
    • Fresh coriander (香菜)
      (replace with chopped spring onions if you don't like coriander)

    DIRECTIONS:

    1. To help the pork maintain its shape during braising, pan sear the sliced pork in a saucepan on medium heat, for about 1 minute on each side [picture 1]. [I pan seared the pork without adding any oil, but you can add about 1 tablespoon of olive oil if you'd like].
    2. In a medium pot, make the braising sauce by adding garlic, onions/spring onions, ginger, chili peppers, Chinese spice bag, rice wine, soy sauce, water, and brown sugar. Add in the pork belly and eggs (optional) and bring to a boil over high heat [picture 2].
    3. Once it starts boiling, turn down to low heat and let it simmer and braise for 1.5 - 2 hours [picture 3]. Feel free to adjust the sauce to your liking but remember that the sauce will thicken as it cooks so don't go too crazy with the seasoning!

    4. Once the buns are steamed and the pork braised, assemble the bun by adding the pickled mustard greens, braised pork, peanut powder and garnish with coriander [picture 4].

    "Tiger Bites Pig" 虎咬豬
    Taiwanese Braised Pork Belly stuffed in Sliced Buns 割包

    Wednesday, January 21, 2009

    Chili Casserole with Cornbread

    Don't be fooled by the pictures, today's recipe is actually a simple one. It's just an integration of 2 of my old dishes: chili and cornbread which are also verrryy easy to make as long as you watch the fire (haha, Denise ;] ). Just pile up the chili onto your casserole dish and pour the cornbread batter around it. If you're really lazy or having problems with the chili, just spread the meat out and pour the batter over it. Either way, you'll impress a few people. This is why i love casseroles; the cheese'll cover whatever mess you made and no one could say no to a topping of perfectly golden baked mozzarella. Except my cheese just looks like spilled glue... thanks to the antique dorm oven of ours; you actually have to push down on the gas knob and light it up w/ a lighter...and better yet, there's REAL fire on the bottom. Mmmhmm, but ah well, that 100-year-old oven is what keeps this blog alive... so i shouldn't be complaining. Anyways, I got this casserole idea from bettycrocker.com, I love that site! If only I could be half as creative as them, sigh.

    Chili Casserole with Cornbread

    derived from bettycrocker.com
    INGREDIENTS:
    • Chili con carne (see recipe here)
    • Cornbread batter (see recipe here, cut the recipe in half)
    • 1 cup of cheese, shredded (i used mozzarella)
    • 2 tablespoons green onions, chopped
    DIRECTIONS:

    1. Spoon hot beef mixture onto the center of your casserole dish (drain excess soup) [picture 1].
    2. Spoon cornbread batter around the outside edge of your ungreased casserole dish [picture 2].
    3. Bake 18 minutes at 400°F.
    4. Sprinkle with cheese and bake for another 4 - 5 minutes or until cheese is melted and cornbread is golden brown [picture 3].
    5. Sprinkle with green onions just before serving.


    Chili Casserole with Cornbread

    Wednesday, January 07, 2009

    Cinnamon Rolls

    School was supposed to start yesterday but to our pleasant surprise, the Dean's office had some scheduling problems so our classes got cancelled! GOOD. I was so not ready for school to start, one last day of 混ing was all i needed before i reactivated my brain. But I guess my extra day didn't do much since my cellphone alarm didn't go off and I had only 10 minutes to get ready for class... yup, this 笨蛋 's cellphone was still in the UK time and she had 1 week to figure that out but didn't. Sighhhhh... I guess God noticed how unprepared i still was for school so He graciously cancelled my evening class and i got myself the rest of the day off, AMEN! So with my afternoon free, I thought I'd bake Irene, the birthday girl, something special. I remember her telling me yesterday that she loved the taste of cinnamon and missed the Cinnabons she used to have in Canada, so I went through my reciple folder and found the recipe I saved up for cinnamon rolls! It was pretty easy to make and most importantly, they came out prettttty! I just thought the sour-cream icing made it a bit too sweet but JLo said all cinnamon rolls are exceedingly sweet anyway. Hmmm, i just hope Irene agrees with him O_O. AHHH WELL, it's the heart that matters... so
    <3 HAPPY BIRTHDAY, IRENE :D

    Cinnamon Rolls
    from allrecipes.com
    INGREDIENTS:
    • 1 cup warm milk (110 degrees F/45 degrees C)
    • 2 eggs, room temperature
    • 1/3 cup margarine, melted
    • 4 1/2 cups all-purpose flour
    • 1 teaspoon salt
    • 1/2 cup white sugar
    • 2 1/2 teaspoons yeast

    • 1 cup brown sugar, packed
    • 2 1/2 tablespoons ground cinnamon
    • 1/3 cup butter, softened

    • 1 (3 ounce / 85 gram) package cream cheese, softened
    • 1/4 cup butter, softened
    • 1 1/2 cups powdered sugar (i used 3/4 cups)
    • 1/2 teaspoon vanilla extract
    • 1/8 teaspoon salt

    DIRECTIONS:


    1. Dissolve the yeast in the warm milk in a large bowl. Mix in the sugar, margarine, salt, and eggs [picture 1].
    2. Add flour and mix well [picture 2].
    3. Knead the dough into a large ball, using your hands dusted lightly with flour [picture 3].
    4. Put in a bowl, cover and let rise in a warm place about 1 hour, or until doubled in size [picture 4].
    5. After the dough has doubled in size turn it out onto a lightly floured surface, cover and let rest for 10 minutes.
    6. In a small bowl, combine brown sugar and cinnamon.
    7. Roll dough into a 16x21 inch rectangle. Spread dough with 1/3 cup butter and sprinkle evenly with sugar/cinnamon mixture [picture 5].
    8. Roll up dough and cut into 12 rolls. Place rolls in a lightly greased 9x13 inch baking pan [picture 6, 7].
    9. Cover the baking pan and let rise until nearly doubled, about 30 minutes [picture 8].
    10. Meanwhile, preheat oven to 400 degrees F (200 degrees C). Bake rolls in preheated oven until golden brown, about 20-25 minutes [picture 10].
    11. While rolls are baking, beat together cream cheese, 1/4 cup butter, confectioners' sugar, vanilla extract and salt [picture 9]. Spread frosting on warm rolls before serving.


    Cinnamon Rolls