Friday, December 25, 2009

Daring Bakers' Gingerbread House

The December 2009 Daring Bakers’ challenge was brought to you by Anna of Very Small Anna and Y of Lemonpi. They chose to challenge Daring Bakers’ everywhere to bake and assemble a gingerbread house from scratch. They chose recipes from Good Housekeeping and from The Great Scandinavian Baking Book as the challenge recipes.

MERRY CHRISTMAS, everyone! I was so excited when i found out that this months' challenge was to make gingerbread houses from scratch-- this meant that JLo and I still get to participate in some festive activities even though there's no pseudo-Christmas dinner for us this year (too busy with tests and preparing for vacations!). The good thing is, to accommodate for the holiday season, Daring Bakers' is letting us post our entries anytime between December 23rd - 27th instead of after Christmas. So here I am, typing out a scheduled post a week beforehand just for the sake of reminding myself that I did, in a way, do something on Christmas Eve this year (they don't celebrate Christmas in Egypt, unfortunately... and that's where i am right now!). So back to the gingerbread, when i first found out about the challenge, I knew immediately that JLo was going to be in charge of the decorating-- he is, after all, the one with the dextrous dentist hands. However, the decorating process just looked so fun that we both ended up fighting for the piping bag. While one person piped, the other would make bossy comments and suggestions that would aggravate the piper even more. And with so many ideas flying around, we just ended up piling everything we had on there and call it a house, LOL. The whole process was pretty fun and we had quite a good laugh out of our finished product. I showed JLo some of the super professional-looking gingerbread houses other Daring Bakers' have posted on the forum and he went, "... are you sure you still want to post ours up?... Please dont." Hahaha, it's okay, I give ourselves a big E for effort! So i guess the Christmas lesson learned this year was: Too many cooks spoil the soup! Next time each of us are getting our own houses to decorate :P

Y's Recipe: Scandinavian Gingerbread (Pepparkakstuga)
from The Great Scandinavian Baking Book by Beatrice Ojakangas
INGREDIENTS:
  • 1 cup butter, room temperature [226g]
  • 1 cup brown sugar, well packed [220g]
  • 2 tablespoons cinnamon
  • 4 teaspoons ground ginger
  • 3 teaspoons ground cloves
  • 2 teaspoons baking soda
  • ½ cup boiling water
  • 5 cups all-purpose flour [875g]
DIRECTIONS:
  1. In a large bowl, cream the butter and sugar until blended [picture 1].
  2. Add the cinnamon, ginger and cloves [picture 2].
  3. Mix the baking soda with the boiling water and add to the dough along with the flour [picture 3, 4].
  4. Mix to make a stiff dough. If necessary add more water, a tablespoon at a time. Chill 2 hours or overnight [picture 5, 6]. (TIP: doughs are prone to a little shrinkage. Make sure you don't overmix the dough initially as you'll overdevelop the gluten and make your dough tough and shrinky).
  5. Cut patterns for the house, making patterns for the roof, front walls, gabled walls, chimney and door out of cardboard (got my pattern from halloween.savvy-cafe.com) .
  6. Roll the dough out on a large, ungreased baking sheet and place the patterns on the dough. Mark off the various pieces with a knife, but leave the pieces in place [picture 7].
  7. [I rolled out the dough on a floured bench, roughly 1/8 inch thick (which allows for fact that the dough puffs a little when baked), cut required shapes and transferred these to the baking sheet. Any scraps I saved and rerolled at the end.]
  8. Preheat the oven to 375'F (190'C). Bake for 12 to 15 minutes until the cookie dough feels firm.
  9. After baking, again place the pattern on top of the gingerbread and trim the shapes, cutting the edges with a straight-edged knife. Leave to cool on the baking sheet [picture 8].
Royal Icing:
INGREDIENTS:
  • 1 egg white
  • 2 cups powdered sugar
DIRECTIONS:
  1. Put the powdered sugar in a mixing bowl and beat in half of the egg white [picture 1]. Slowly add the remaining egg white while mixing, making sure the icing doesn't get too wet.
  2. If 1 egg white is not enough, add water a little bit at a time until your icing reaches a glue-like consistency [picture 2].
  3. If you aren't using it all at once you can keep it in a small bowl, loosely covered with a damp towel for a few hours until ready to use. You may have to beat it slightly to get it an even consistency if the top sets up a bit. Piped on the house, this will set up hard over time.

Kindergarteners could've done a better job than this-- FAIL!
But it's so ugly to the point that... it's actually kinda cute XD
Gingerbread House

Tuesday, December 15, 2009

Daring Cooks' Salmon en Croute

The 2009 Daring Cooks challenge was hosted by Simone of Junglefrog Cooking. Simone chose Salmon en Croute (or alternative recipes for Beef Wellington or Vegetable en Croute) from Good Food Online.

I really need to tattoo the Daring Cooks' posting date on my arm or something... why do i keep thinking it's the 17th?? I guess i get too excited about the reveal date that i mix it up with the posting :( This is like the 3rd time thats happened, ughhh... i frustrate myself too much. But anyways, this month's challenge was hosted by Simone of Junglefrog Cooking and she picked Salmon en Croute for the December challenge. I've been meaning to make Salmon en Croute for a while now so thank you Simone for reading my mind! I was absolutely in love with everything about it that i actually made this a week after the reveal date (that's a huge improvement considering what a procrastinator I am). The recipe was very simple and everything went well during the process. My only complaint was that there weren't any fresh veggies at the grocery store the day i went shopping so i had to use frozen spinach instead. The cream cheese mixture turned out a little dry (squeezed too much out of the spinach) but that was okay since JLo and I don't pay too much attention to little details. I also made my own shortcrust pastry and used butterfly cookie cutters for decorations. Had to patch up some of the torn parts on my crust though, hope it isn't too visible on the pics XD. I would totally make this for Christmas dinner but since we'll be off on vacations, maybe for new years? We shall see!

Shortcrust Pastry
INGREDIENTS:
  • 450 grams (3.2 cups) all-purpose flour
  • 200 grams butter, very cold and cubed
  • 1 teaspoon salt
  • 2 - 3 tablespoons cold water
DIRECTIONS:
  1. Sift the flour into a large bowl, add the butter and rub in with your fingertips until the mixture resembles fine breadcrumbs.
  2. Stir in the salt and 2 -3 tablespoons of water and mix to a firm dough. Knead the dough briefly and gently on a floured surface. Wrap in cling film and chill while preparing the filling.
  3. If you have a food processor: put the flour, butter and salt in the food processor and pulse until it resembles fine breadcrumbs. With the motor running, gradually add 2 - 3 tablespoons of water through the funnel until the dough comes together [picture 1]. Gather the coarse crumbs together and push to form a ball [picture 2]. Wrap in cling film and chill while preparing the filling [picture 3].
Salmon en Croute
INGREDIENTS:
  • 150 grams cream cheese or mascarpone
  • 120 grams watercress, rocket (argula) and spinach
    [i used frozen leaf spinach]
  • 500 grams shortcrust pastry [recipe above]
  • 500 grams salmon fillet, skinless
    [Check out Gordon Ramsay's video on How to Skin and Bone a Salmon]
  • Salt and pepper to taste
  • 1 medium egg, for eggwash
DIRECTIONS:
    1. Heat the oven to 200°C/390 F.
    2. Put the mascarpone or cream cheese in a food processor with the watercress, spinach and rocket and whizz the lot until you have a creamy green puree. Season well [picture 1. 2].
    3. Roll the pastry out so you can wrap the salmon in it completely (approx. 2-3 mm thick) [picture 3]and lay it on a buttered or oiled baking sheet (it will hang over the edges). Put the salmon in the middle [picture 4]. If it has a thinner tail end, tuck it under.
    4. Spoon half of the watercress/spinach mixture onto the salmon [picture 4].
    5. Now fold the pastry over into a neat parcel (the join will be at the top, so trim the edge neatly), making sure you don’t have any thick lumps of pastry as these won’t cook through properly [picture 5]. Trim off any excess as you need to.
    6. Make 3 neat cuts in the pastry to allow steam to escape and make some decorations with the off-cuts to disguise the join if you like [picture 6]. Brush with the egg glaze.
    7. Bake for 30 minutes or until the pastry is crisp and browned. To test wether the salmon is cooked, push a sharp knife through one of the cuts into the flesh, wait for 3 seconds then test it against the inside of your wrist; if it is hot, the salmon is cooked.
    8. Serve with the rest of the watercress puree as a sauce.

    Salmon en Croute

    Sunday, December 06, 2009

    German Potato Salad with Bacon-Vinegar Dressing and Dill

    Like most people, I'm also the type of person who needs something to snack on during stressful times. When I have big exams coming up, I usually make myself something that'll last me for at least 2 all-nighters: it could be a batch of brownies, a tray of muffins, a pot of chili, or in this case, a bowl of potato salad. I have one potato salad recipe that I've been using since high school so it was about time I tried something new. Most of the recipes i browsed through were pretty similar; they were mostly mayo-based with only slight changes with the veggies thrown inside. So this time I went another direction and made a warm German potato salad. Vinegar is used instead of mayonnaise, making it an excellent choice for calorie-conscious carb-lovers like me (okay, the bacon probably counterbalances the omitted mayo but you can always choose a thinner cut of meat). One thing you gotta keep in mind though is that the 1/2 a cup of vinegar required may be too poignant for normal people (it was fine for me since i like strong flavors). You can either decrease the amount of vinegar according to taste or neutralize the sour taste with some sugar-- that's a little cooking tip that i got from my mom ;) Other than that, you shouldn't have any problems with this recipe. Hope you enjoy it as much as i did!

    German Potato Salad with Bacon-Vinegar Dressing and Dill
    INGREDIENTS:
    • 1 kilogram (2 1/4 lbs) potatoes, peeled, cut into 1/4-inch-thick slices
    • 6 bacon slices, chopped (or 100 grams bacon bits)
    • 1/2 cup finely chopped red onion
    • 1/2 cup white wine vinegar [or less, according to taste]
    • 1/2 cup water
    • 2 teaspoons coarse-grained mustard
    • 2 teaspoons sugar
    • 2 teaspoons salt
    • 1/2 teaspoon ground black pepper
    • 1/4 cup chopped fresh dill
      DIRECTIONS:

      1. Boil potatoes until tip of knife easily pierces center of slices [picture 1]. Transfer to large bowl. Cover with foil.
      2. Sauté bacon in large skillet over medium heat until brown, about 3 minutes [picture 2]. Using slotted spoon, transfer bacon to paper towels. Discard all but 2 1/2 tablespoons drippings.
      3. Heat drippings in skillet over medium heat. Add onion; sauté 2 minutes [picture 3]. Whisk in next 6 ingredients. Simmer until mixture is reduced to 2/3 cup, about 4 minutes [picture 4]. Remove from heat.
      4. Add potatoes to the skillet and toss to coat with dressing [picture 5]. Let stand for 3 minutes.
      5. Sprinkle with chopped bacon and fresh dill; toss. Season to taste with salt and pepper [picture 6, 7, 8].
      6. Transfer the potato salad to a serving platter. Serve warm.

      German Potato Salad

      with Bacon-Vinegar Dressing and Dill

      Sunday, November 29, 2009

      Daring Bakers' Cannoli

      The November 2009 Daring Bakers Challenge was chosen and hosted by Lisa Michele of Parsley, Sage, Desserts and Line Drives. She chose the Italian Pastry, Cannolo (Cannoli is plural), using the cookbooks Lidia’s Italian-American Kitchen by Lidia Matticchio Bastianich and The Sopranos Family Cookbook by Allen Rucker; recipes by Michelle Scicolone, as ingredient/direction guides. She added her own modifications/changes, so the recipe is not 100% verbatim from either book.
      Once again i'm doing everything at the last minute: studying at the last minute, doing the challenge at the last minute, and even posting at the last minute (and still late). So this is going to be a super quick update since i'm running out of study time for the upcoming Neurology finals. Arghhh! This month for the Daring Bakers' challenge we were to make Cannolis. I have never heard of them until our host gave us a brief description about it: "The cannoli is a fried, tube-shaped pastry shell (usually containing wine) filled with a creamy amalgamation of sweetened ricotta cheese, chocolate, candied fruit or zest, and sometimes nuts." With no idea how these should taste, i decided to stick to the original recipe provided by Lisa Michele instead of going crazy with variations. The biggest problem i had were finding replacements for the frying Cannoli tubes... i saw other daring bakers using sawed off broom-sticks, cannenoli pasta shells, and crumpled aluminum baking pans. I was so lazy that even those simplified-to-the-max replacements seemed too much of a hassle to prepare. Instead of using their suggestions, i went ahead and used... my stainless-steel Ikea can opener! Yep, after searching through all my cooking utensils, the round handles on the can opener were just the perfect size for the cannoli tubes, LOL. But hey, they worked magically! Frying them one by one in my little metal cup took about an hour but at least i saved myself some money with this ghetto little trick! The cannoli shells turned out great but i wasn't a big fan of this dessert itself... i thought the ricotta filling tasted a bit odd with the combination of chocolate chips and orange zest. If i ever make this again (or more like, if i ever buy myself some cannoli tubes), i'll probably use mascarpone cheese instead and leave out the orange zest. I only ate 2 cannolis and had JLo finish the rest. Yay for unpicky boyfriends!

      Cannoli Shells
      INGREDIENTS:
      • 2 cups (250 grams/8.82 ounces) all-purpose flour
      • 2 tablespoons(28 grams/1 ounce) sugar
      • 1 teaspoon (5 grams/0.06 ounces) unsweetened baking cocoa powder
      • 1/2 teaspoon (1.15 grams/0.04 ounces) ground cinnamon
      • 1/2 teaspoon (approx. 3 grams/0.11 ounces) salt
      • 3 tablespoons (42 grams/1.5 ounces) vegetable or olive oil
      • 1 teaspoon (5 grams/0.18 ounces) white wine vinegar
      • Approximately 1/2 cup (approx. 59 grams/approx. 4 fluid ounces/approx. 125 ml) sweet Marsala or any white or red wine you have on hand
      • 1 large egg, separated (you will need the egg white but not the yolk)
      • Vegetable or any neutral oil for frying – about 2 quarts (8 cups/approx. 2 litres)
      • 1/2 cup (approx. 62 grams/2 ounces) toasted, chopped pistachio nuts, mini chocolate chips/grated chocolate and/or candied or plain zests, fruits etc.. for garnish
      • Confectioners' sugar
      DIRECTIONS:

      1. In the bowl of an electric stand mixer or food processor, combine the flour, sugar, cocoa, cinnamon, and salt [picture 1]. Stir in the oil, vinegar, and enough of the wine to make a soft dough [picture 2]. Turn the dough out onto a lightly floured surface and knead until smooth and well blended, about 2 minutes. Shape the dough into a ball [picture 3]. Cover with plastic wrap and let rest in the fridge from 2 hours to overnight [picture 4].
      2. Cut the dough into two pieces. Keep the remaining dough covered while you work. Lightly flour a large cutting or pastry board and roll the dough until super thin, about 1/16 to 1/8” thick (An area of about 13 inches by 18 inches should give you that). Cut out 3 to 5-inch circles (3-inch – small/medium; 4-inch – medium/large; 5-inch;- large. Your choice). Roll the cut out circle into an oval, rolling it larger and thinner if it’s shrunk a little [picture 5].
      3. Oil the outside of the cannoli tubes (You only have to do this once, as the oil from the deep fry will keep them well, uhh, oiled..lol). Roll a dough oval from the long side (If square, position like a diamond, and place tube/form on the corner closest to you, then roll) around each tube/form and dab a little egg white on the dough where the edges overlap. (Avoid getting egg white on the tube, or the pastry will stick to it.) Press well to seal. Set aside to let the egg white seal dry a little [picture 6].
      4. In a deep heavy saucepan, pour enough oil to reach a depth of 3 inches, or if using an electric deep-fryer, follow the manufacturer's directions. Heat the oil to 375°F (190 °C) on a deep fry thermometer, or until a small piece of the dough or bread cube placed in the oil sizzles and browns in 1 minute. Have ready a tray or sheet pan lined with paper towels or paper bags.
      5. Carefully lower a few of the cannoli tubes into the hot oil [picture 7]. Do not crowd the pan. Fry the shells until golden, about 2 minutes, turning them so that they brown evenly [picture 8].
      6. Lift a cannoli tube with a wire skimmer or large slotted spoon, out of the oil. Using tongs, grasp the cannoli tube at one end. Very carefully remove the cannoli tube with the open sides straight up and down so that the oil flows back into the pan. Place the tube on paper towels or bags to drain. Repeat with the remaining tubes. While they are still hot, grasp the tubes with a potholder and pull the cannoli shells off the tubes with a pair of tongs, or with your hand protected by an oven mitt or towel. Let the shells cool completely on the paper towels. Place shells on cooling rack until ready to fill.
      7. Repeat making and frying the shells with the remaining dough. If you are reusing the cannoli tubes, let them cool before wrapping them in the dough [picture 9].
      Cannoli Filling:
      INGREDIENTS:
      • 2 lbs (approx. 3.5 cups/approx. 1 kg/32 ounces) ricotta cheese, drained
      • 1 2/3 cups cup (160 grams/6 ounces) confectioner’s sugar, (more or less, depending on how sweet you want it), sifted
      • 1/2 teaspoon (1.15 grams/0.04 ounces) ground cinnamon
      • 1 teaspoon (4 grams/0.15 ounces) pure vanilla extract or the beans from one vanilla bean
      • 3 tablespoons (approx. 28 grams/approx. 1 ounce) finely chopped good quality chocolate of your choice
      • 2 tablespoons (12 grams/0.42 ounces) of finely chopped, candied orange peel, or the grated zest of one small to medium orange
      • 3 tablespoons (23 grams/0.81 ounce) toasted, finely chopped pistachios
      DIRECTIONS:

      1. Line a strainer with cheesecloth. Place the ricotta in the strainer over a bowl, and cover with plastic wrap and a towel. Weight it down with a heavy can, and let the ricotta drain in the refrigerator for several hours to overnight [picture 1].
      2. In a bowl with electric mixer, beat ricotta until smooth and creamy [picture 2]. Beat in confectioner’s sugar, cinnamon, vanilla and blend until smooth [picture 3]. Transfer to another bowl and stir in chocolate, zest and nuts [picture 4]. Chill until firm.(The filling can be made up to 24 hours prior to filling the shells. Just cover and keep refrigerated) [picture 5].
      ASSEMBLE THE CANNOLI:
      1. When ready to serve..fill a pastry bag fitted with a 1/2-inch plain or star tip, or a ziplock bag, with the ricotta cream. If using a ziplock bag, cut about 1/2 inch off one corner. Insert the tip in the cannoli shell and squeeze gently until the shell is half filled. Turn the shell and fill the other side. You can also use a teaspoon to do this, although it’s messier and will take longer.
      2. Press or dip cannoli in chopped pistachios, grated chocolate/mini chocolate chips, candied fruit or zest into the cream at each end. Dust with confectioner’s sugar and/or drizzles of melted chocolate if desired.
      Cannoli

      Sunday, November 22, 2009

      "Tiger Bites Pig" 虎咬豬 Taiwanese Braised Pork Belly stuffed in Sliced Buns 割包

      Anyone who calls him or herself a true Taiwanese should be no stranger to today's dish. Though the more common street name for it is "Gua Bao (割包)", they are also referred to as "Ho Ka Ti (虎咬豬)" in the Taiwanese dialect, which literally translates into "Tiger Bites Pig". But before you let your imagination run wild, let me just clarify that there are no illegal tiger-eating involved here. This dish rather got its distinct name by the shape of its bun. Instead of cutting a regular Mantou in half, sliced buns are customarily made to be used for Gua Bao. The two bun flaps resembles the mouth of a tiger, and if you are gifted enough, you should be able to see a tiger biting a piece of pork. Cute, huh? The traditional Gua Bao is stuffed with braised pork, sweet peanut powder, pickled mustard greens, and a huge bunch of cilantro. But since I had no access to 3/4 of the condiments, i improvised and made my own peanut powder (or more like granules) and sprinkled it with chopped spring onions instead. My Guao Bao may not be 100% authentic... but for a taiwanese food-deprived person like me, i couldn't even tell the difference! It's really that piece of slowly braised pork belly (which simply melts down your throat) that plays the key role to this celebrated Taiwanese sandwich. With the excess oil and fat melting out of the pork during the long braising/cooking hours, 'greasy' would be the last word you use to describe Gua Baos. So don't let that fatty piece of pork scare you away, give it a try... it's the best part!

      Part #1: Sliced Buns
      from 美食美景紐西蘭美女的家
      makes 14 sliced buns
      INGREDIENTS:
      • 1 cup water
      • 40 grams (6 tablespoons) white sugar
      • 1 teaspoon salt
      • 1 tablespoon olive oil
      • 500 grams high-gluten flour
      • 1 tablespoon powdered milk
      • 1 teaspoon baking powder
      • 2.5 teaspoons active dry yeast
      DIRECTIONS:

      1. For Bread Machine: place all ingredients in the listed order into your bread machine. Set the mode to "Knead and Rise" (this took around 1 hour and 20 minutes on my bread machine).
      2. If kneading by hand, you can also place all ingredients in the listed order into a big bowl and knead for 15 - 20 minutes until the dough forms a smooth ball [picture 1]. Put the dough in a bowl, cover and let rise in a warm place for 1 hour, or until doubled in size [picture 2].
      3. Remove the dough and separate it into 50 gram pieces (around 14).
      4. Form the dough into a ball and with a rolling pin, roll it out into a long oval shape [picture 3].
      5. Light brush one surface with vegetable oil and fold the dough in half [picture 3, 4]. Place the dough on cut-out baking paper or a cheesecloth to prevent sticking. Let it rise for another 30 minutes, covered, in a warm place [picture 4].
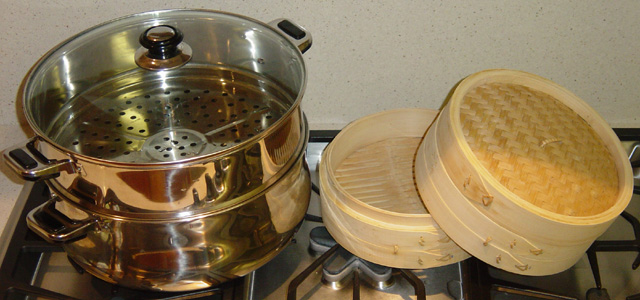
      6. When the dough has risen after 30 minutes, place them inside the metal or bamboo cooking steamers that you are using. Make sure they do not touch, about 1 inch away from each other.
      7. Turn on the stove to high heat until the water starts boiling.
      8. Once the water has boiled, turn down to medium heat and steam for 10 minutes.
      Steaming TIPS:
      • Avoid opening the lid too soon-- the buns will collapse when met with cold air.
      • Make sure the water on the steamer lid does not drop onto the buns, as they will create rough surfaces.
      • If the buns harden up after leaving them out for too long, just quickly steam them again and they'll be soft and fluffy in no time.

        Part #2: Tiger Bites Pig 虎咬豬
        from ytower.com
        INGREDIENTS:
        • TAIWANESE BRAISED PORK BELLY:
        • 600 grams skin-on pork belly, cut into half inch slices
        • 3 cloves garlic, crushed
        • One Bunch of spring onions, cut into 3 inch segments (or 1 whole onion)
        • 5 slices fresh ginger
        • 2 red chili peppers (more if desired), sliced
        • 1 Chinese spice bag
        • 50 mililiters rice wine
        • 3/4 cups soy sauce
        • 3 to 4 cups water (enough to submerge the meat)
        • 1/3 cups brown sugar
        • Hard boiled eggs, peeled (optional)
          (To utilize your sauce to its fullest, you can add in some eggs to make another dish: Taiwanese Stewed Eggs!)

        • TIGER BITES PIG:
        • Steamed sliced buns (recipe above)
        • Braised Pork belly
        • Sweet peanut powder
          (or pulse peanuts and a little bit of powdered sugar into a powder with your food processor)
        • Pickled mustard greens (酸菜)
        • Fresh coriander (香菜)
          (replace with chopped spring onions if you don't like coriander)

        DIRECTIONS:

        1. To help the pork maintain its shape during braising, pan sear the sliced pork in a saucepan on medium heat, for about 1 minute on each side [picture 1]. [I pan seared the pork without adding any oil, but you can add about 1 tablespoon of olive oil if you'd like].
        2. In a medium pot, make the braising sauce by adding garlic, onions/spring onions, ginger, chili peppers, Chinese spice bag, rice wine, soy sauce, water, and brown sugar. Add in the pork belly and eggs (optional) and bring to a boil over high heat [picture 2].
        3. Once it starts boiling, turn down to low heat and let it simmer and braise for 1.5 - 2 hours [picture 3]. Feel free to adjust the sauce to your liking but remember that the sauce will thicken as it cooks so don't go too crazy with the seasoning!

        4. Once the buns are steamed and the pork braised, assemble the bun by adding the pickled mustard greens, braised pork, peanut powder and garnish with coriander [picture 4].

        "Tiger Bites Pig" 虎咬豬
        Taiwanese Braised Pork Belly stuffed in Sliced Buns 割包